
Skip to content
619-353-5995

Best Way to Pack Books When Moving (Without Damaging Them) 

You’ve spent years building your book collection. Some of them are dog-eared and beloved. Some are first editions you’d never replace. And then moving day arrives, and suddenly every single one of them is at risk – cracked spines, warped covers, moisture damage, or worse, a box that gives out halfway down the stairs. 

Here’s the thing: most packing guides tell you to use small boxes and wrap things in paper. That’s true, but it barely scratches the surface. This guide covers everything from the basics to the stuff most movers only learn after something goes wrong. 

Step 1: Declutter Before You Pack a Single Book

This is the step most people skip, and they regret it. A typical book weighs 1–2 pounds, and on long-distance moves, transport costs run roughly $0.50–$1.00 per pound – meaning a 200-book collection you haven’t touched in years could cost you $200–$400 just to haul to your new home. 

Before you pull out a single box, go shelf by shelf. Pull out duplicates, books you’ll never re-read, and titles you could easily access at a library or digitally. Donate good-condition books to local libraries, schools, or used bookstores. Sell anything valuable online – it offsets moving costs and lightens the load considerably. 

Only once you’ve made hard decisions about what stays should you start packing. Fewer books = fewer boxes = less money and less back pain. 

Step 2: Gather the Right Supplies

You don’t need a ton of materials, but you do need the right ones. Using the wrong box or skipping padding is how books get damaged. 

Here’s your packing supply checklist: 

  • Small to medium boxes – Never use large boxes for books. Even a medium box full of hardcovers can weigh 60-80 pounds, which is a back injury waiting to happen and will likely cause the bottom to blow out. 
  • Packing tape – Reinforce the bottom of every box in an H-pattern before loading anything in. Books shift more than you’d expect once a truck starts moving. 
  • Packing paper or clean newsprint – For separating covers and filling gaps. Avoid printed newspaper ink – it can transfer onto pages and ruin covers. 
  • Bubble wrap – Reserve this for rare, signed, or antique editions. You don’t need it for everyday paperbacks. 
  • Acid-free tissue paper – Essential if you’re packing older or collectible books. Acid-free paper helps prevent pages from yellowing during storage or transit. 
  • Permanent markers and labels – You’ll thank yourself on unpacking day. 
  • Silica gel packets – A tip most guides completely skip: tossing a few silica gel packets into book boxes absorbs excess moisture during the move, especially useful if you’re relocating during monsoon season or to a humid climate. 

Step 3: Sort Your Books Before Packing

Random packing creates awkward gaps, uneven weight, and a nightmare when you try to unpack. Take 20 minutes to sort first. 

Organize by size – hardcovers together, paperbacks together, oversized coffee table books separately. Separate hardcovers from paperbacks, as they require slightly different packing approaches. Identify rare, valuable, or sentimental books that need special protection. 

Sorting by size also means you’ll pack more efficiently – books of similar dimensions leave fewer gaps and create more stable stacks inside boxes. 

Guide to Pack Books The Right Way

Step 4: Pack Books the Right Way (Position Matters More Than You Think)

This is where most people go wrong. Book positioning inside a box directly determines whether spines crack, pages warp, or bindings separate. 

Here are the three valid packing positions: 

Flat on their backs (stacked): Best for hardcovers of the same size. Pack them flat with spines alternating directions to distribute weight evenly. Stack three to four books per layer, then add a layer of packing paper or a folded towel before starting the next layer. 

Standing upright (spine against the box wall): Works well for sturdy hardcovers. Place the hardcover books upright in the box, just as you would place them on a shelf – with the spine facing the side of the box, not up or down. 

Spines facing downward: Packing your books with the spine against the bottom ensures that your pages are less likely to be damaged. This works particularly well for paperbacks. 

One rule that never changes: books packed with spines facing up experience pressure on their weakest point, causing pages to separate from the bindings. Never pack spines upward. 

Put heavy books on the bottom, medium-weight books in the middle, and light books on top. This will prevent your more delicate books from getting crushed. 

Step 5: Keep Boxes at a Safe Weight

A properly packed book box should weigh no more than 30–40 pounds so you can comfortably carry it. Test the weight as you pack. If a box feels too heavy, remove a few books and start a new box. 

Use the remaining space in lighter boxes for soft, lightweight items – pillows, linens, or stuffed animals work perfectly and double as extra padding for your books. 

After filling, press lightly on the top layer. If books shift, fill the gap with crumpled packing paper or a folded towel. Books should feel snug but not forced – nothing should move, but nothing should be bent either. 

Step 6: Special Care for Rare, Antique, or Collectible Books

Everyday paperbacks can handle a basic pack-and-go approach. Rare editions, first prints, signed copies, and leather-bound books are a completely different matter. 

Photograph them first. Photograph each valuable book before packing – both covers and any visible damage – for insurance records and condition confirmation. This step takes five minutes and could save you thousands if something gets damaged in transit. 

Use archival-quality materials. Wrap each rare book in acid-free tissue or archival wrap, then add a second layer of packing paper or bubble wrap. This creates a protective barrier and prevents covers from rubbing together. 

Box them separately. Pack rare books in their own dedicated boxes, separate from your general collection. Mark these boxes clearly as “FRAGILE” and consider transporting them in your personal vehicle rather than on the moving truck if possible. 

Watch the climate. Rare books are sensitive to heat and humidity, even during short periods in transit. Avoid leaving them in moving trucks, garages, or other non-climate-controlled areas for too long. If possible, load them last and unload them first to minimize their time in hot or damp environments. Even temporary exposure can cause warping, mold, or other types of damage. 

For truly irreplaceable collections, consider contacting a specialist removal company experienced in handling archival materials – the cost is worth the peace of mind. 

Step 7: Label Everything Specifically

“Books” is not a label. Label each box with its contents and destination room – for example, “Fiction – Living Room” or “Cookbooks – Kitchen.” This step takes 30 seconds per box and will save you hours of frustration when you’re standing in a pile of boxes on the other end. 

Add handling notes too – “Heavy,” “Fragile,” and the destination room should all be on at least two sides of the box, so the label is visible no matter how the box gets stacked. 

Common Packing Mistakes That Damage Books

Even experienced movers make these errors: 

  • Using oversized boxes – They cave under book weight and are impossible to carry safely 
  • Packing spines upward – This is the single most common cause of binding damage 
  • Skipping the tape reinforcement – Box bottoms fail under heavy loads 
  • Using newspaper ink directly on covers – The ink transfers and stains 
  • Packing books too loosely – Books shift in transit and arrive with bent corners and torn covers 
  • Storing books improperly after packing – Always keep book boxes in dry, temperature-controlled areas 

Alternative Packing Ideas Worth Knowing

No boxes lying around? Rolling suitcases work surprisingly well – they’re sturdier, more spacious, and come with wheels, making them much easier to transport to and from the moving van. This is especially practical for heavy hardcover collections. 

If your suitcase has interior straps, use them to secure the books in place. 

When You’re Not Moving Immediately – Consider Storage

Sometimes a move isn’t door-to-door. Maybe there’s a gap between leases, a renovation delay, or you’re downsizing and need time to figure out what stays. In those situations, your books need a safe place to live that isn’t a damp garage or a climate-uncontrolled unit. 

Big Box Storage is an ideal solution for book lovers who need reliable, accessible storage during a move. With clean, secure storage units and the flexibility to store your collection short or long-term, it removes the anxiety of stacking book boxes in a corner and hoping for the best. Whether it’s a few boxes of your regular reads or an entire rare collection waiting for its new home, Big Box Storage gives your books the environment they deserve while your move comes together. 

Final Thought

Packing books well isn’t complicated – but it does require intention. Use small boxes, reinforce the bottoms, respect the weight limit, position spines correctly, and give your valuable editions the individual attention they need. Do that, and your collection will arrive exactly as it left: intact, organized, and ready to fill new shelves. 

Your books traveled a long way to end up in your hands. A little care on moving day is the least you can do. 

Frequently Asked Questions

The best way to pack books is to use small sturdy boxes, place heavier books at the bottom, and pack them flat or upright with proper padding to prevent damage during transport. 

Books can be packed flat or upright depending on their size and type. Hardcovers are safest packed flat or upright with the spine against the box wall, never facing upward.

Use clean packing paper, sealed boxes, and silica gel packets to absorb excess moisture. Keep book boxes in dry, climate-controlled areas whenever possible.

A book box should ideally weigh no more than 30–40 pounds. Smaller boxes are easier to carry and reduce the risk of box damage or back injuries.

College students can move books more easily by using rolling suitcases, decluttering old textbooks, packing only essentials, and labeling boxes by subject or semester. 

Jak się zarejestrować oraz logowanie w całej Mostbet Polska zacznij odgrywać obecnie dziś!

Opcje aplikacji mobilna oraz przystępność odmiany potrafią podlegać od GEO jak i również ustawień maszyny. Jeżeli odrzucić potrzebujesz instalować równoczesnego aplikacji, Mostbet PL oferuje podobnie zoptymalizowaną wersję mobilną przeglądarki. Continue reading “Jak się zarejestrować oraz logowanie w całej Mostbet Polska zacznij odgrywać obecnie dziś!”

How to Downsize Your Home (And What to Do with Everything That Won’t Fit)

Quick Answer: Downsizing your home means more than moving – it means deciding what to do with everything that won’t fit in your new space. The most effective approach is a four-category framework: keep, store, donate, or sell. Portable storage units are especially useful during this transition, giving you a physical buffer to sort belongings without forcing premature decisions. Most people underestimate the time needed – start the process at least 90 days before your move date.

Most people think the hardest part of downsizing is finding the smaller home. It isn’t. The hardest part is standing in a living room full of furniture, knowing a third of it won’t fit – and having no plan for what happens next. 

Here’s the thing most people miss: downsizing isn’t a decluttering project. It’s a logistics problem with an emotional layer on top. When you treat it that way, the whole thing becomes a lot more manageable. 

Who’s Downsizing Right Now – and Why It Matters 

Downsizing is no longer just a retirement milestone. According to the National Association of Realtors (NAR), roughly 73% of recent homebuyers had no children under 18 living at home – a signal that today’s housing market is increasingly shaped by smaller households. With the median homebuyer age rising into the late 50s, many of these buyers are older adults transitioning out of long-held family homes, often reevaluating how much space they actually need. 

But that’s only part of the story. A second, often overlooked group is younger buyers who aren’t downsizing by choice – they’re right-sizing out of necessity. In high-cost markets like San Diego, where median home prices have climbed well around or above $800,000, many buyers in their 30s and 40s are opting for smaller condos simply because larger homes are out of reach. The result is the same logistical challenge – less space – but a very different emotional context. 

Both groups arrive at the same question: you have a house full of belongings, but less room to keep them. What stays, and what goes

The Four-Category Framework: Keep, Store, Donate, Sell 

Stop sorting by room. Start sorting by decision. 

Every item in your home belongs in one of four buckets, and the faster you apply this framework, the less overwhelmed you’ll feel. 

Keep – Items that fit your new space physically and serve a real purpose in your new life. Be honest here. A 12-person dining table doesn’t belong in a two-bedroom condo, no matter how much you love it. 

Store – Items you’re not ready to part with but don’t have room for yet. Seasonal equipment, family heirlooms, a second car, hobby gear for the garage you no longer have. This isn’t avoidance – it’s a legitimate category. Portable storage is purpose-built for exactly this gap. With Big Box Storage’s portable storage solutions, a unit gets dropped at your driveway, you load it on your timeline, and it moves when you do. 

Donate – Functional items you don’t need. Goodwill, Habitat for Humanity ReStores, local shelters, Buy Nothing groups on Facebook. San Diego has strong donation infrastructure – use it. 

Sell – Furniture, appliances, and collectibles with real resale value. Facebook Marketplace, Craigslist, and estate sale companies all work well for this. Don’t underestimate what a good mid-century credenza or solid wood bookcase will fetch. 

The mistake most people make is defaulting everything to “keep” or “donate” while skipping the sell and store categories entirely. Those two categories are where you actually solve the problem. 

Room-by-Room: Where to Start 

Order matters. Start with the lowest emotional weight, build momentum, then tackle the hard rooms. 

Garage and storage areas first. This is where the obvious discards live – duplicates, broken items, things you forgot you owned. Clear this first and you’ll generate immediate physical space to work in. 

Guest bedroom second. Often doubles as a holding zone for stuff without a home. Sort it, don’t shuffle it. 

Living room and dining room third. Furniture scale is the central challenge here. Measure your new space before you decide anything. A sofa that seats six will dominate a 400-square-foot living room. 

Primary bedroom last. This carries the most personal weight. Give it the time it needs. 

Furniture That Won’t Fit: Storage vs. Marketplace 

This is where people get stuck. You have a piece you love – or inherited – but it simply doesn’t belong in a 1,200-square-foot condo. 

The honest answer: if you’re not planning to use a piece within the next 12 months, a storage solution can give you the flexibility to hold onto it without overcrowding your current space. Storage boxes or units let you preserve items you value while giving yourself time to decide what truly fits your lifestyle – without the pressure to make a quick decision. 

That said, there are legitimate reasons to store furniture during a transition. If you’re moving into a temporary space while a renovation finishes, or you’re bridging between selling and buying, keeping furniture in a portable storage unit for a few months makes financial sense. You’re not paying to store indefinitely – you’re buying time to make the right decision without pressure. 

Simple Sorting Guide

Why Portable Storage Works Better Than a Truck for Downsizing 

Traditional moving truck logic assumes you know exactly what you’re taking on move day. Downsizing rarely works that way. You’re making decisions in real time, often discovering mid-pack that the bookcase won’t fit or the guest room bed needs to go. 

Portable storage units flip this dynamic. You load at your own pace, over days or weeks. You can pull items back out if you change your mind. The unit travels to your new address – or stays in storage – based on what you actually need, not what you guessed you’d need in advance. 

For downsizers in San Diego specifically, this matters because many transitions involve staging a home for sale while still living in it. A portable unit in the driveway can hold furniture and boxes that would otherwise clutter showings, without requiring you to rent a separate storage facility mid-move. If you want to compare portable storage with traditional self-storage to see which fits your situation, that breakdown covers costs, access, and logistics side by side. 

The Downsizing Timeline: 90 Days Out to Move-In Day 

90 days out: Apply the four-category framework room by room. Start donation runs. List high-value items for sale. 

60 days out: Schedule your portable storage unit delivery. Begin packing non-essentials. Confirm furniture dimensions against your new floor plan. 

30 days out: Finalize keep vs. store decisions. Complete sales. Clear donated items. 

Move week: Load your portable unit. Stage the home for final walkthrough or photos. Let the unit do the heavy lifting – literally. 

After move-in: Unpack keep items. Access your storage unit as needed. Make final sell or donate decisions for stored items within 6–12 months. 

Final Thoughts 

The real secret to downsizing well isn’t sentimentality management or ruthless minimalism. It’s giving yourself enough time and enough physical space to make decisions without panic. A portable storage unit isn’t a crutch – it’s the tool that makes thoughtful decisions possible. 

Start earlier than you think you need to. Sort by decision category, not by room. And remember: the goal isn’t an empty house. It’s a new home with exactly what you need in it. 

What Is a Portable Storage Unit and How Does It Work? 

You are looking at a garage that’s completely full and you have to move in three weeks, but you do not want to rent a truck and do everything in one busy Saturday. This situation is very common. 
The problem is that traditional moving methods can be very stressful. That is why portable storage units were created. They are a good alternative to traditional self-storage. Once you understand how they work, it is easy to see why they are a choice. 

What is a Portable Storage Unit? 

A portable storage unit is a container made of wood that’s resistant to bad weather. It is delivered to your home, so you do not have to drive your things to a storage unit. This container is very easy to use. You can walk your items into it and load them at your own pace. When you are done, you can keep the unit at your house. Or you can have the company pick it up and store it in a safe place. 

Big Box Storage offers portable storage units and delivers them to homes in San Diego. You can load them on your own schedule. Then they store the units in a place until you need your things again. 

How Does the Process Work? 

The process of using a portable storage unit is very simple. 

Step 1: You order the unit. Schedule a delivery date. 
The company delivers the unit to your home. You can load it at your own pace. This is an advantage over traditional moving methods, where you must load everything in one day. 

Step 2: You load the unit yourself. 
This is beneficial because you can pack your items in the order you want, and you can make sure that fragile things are wrapped carefully. You do not have to give your things to strangers to move. 

Step 3: You choose what to do with the unit. 
When you are done loading, you can have the company pick up the unit and store it in a place. If you are moving to a new home, the unit can be delivered to your new address. If you need to store your things for a while, the unit can be stored at a facility until you are ready. 

Who Uses Portable Storage Units? 

Many people use portable storage units. 

Homeowners who are renovating their homes often need to clear out rooms. They do not want to move everything. A portable storage unit is a solution. 

Families who are selling their homes and moving to a new one often need a place to store their things while they are in between homes. 

Businesses use portable storage units to store inventory, tools, and equipment. 

Military families use them to store their belongings when they are deployed. 

Big Box Storage offers portable storage units that are designed to meet the needs of people. 

Portable Storage vs Traditional Self-Storage 

Self-storage has been around for a long time, and many people are familiar with it. However, it can be very inconvenient. You must rent a truck, make trips, and fit everything into a busy schedule. 

Portable storage units are much easier to use. The unit is delivered to your home. You can load it at your own pace. You do not have to worry about renting a truck or making trips. 

However, portable storage units may not be the best choice for everyone. If you need to access your things every day, a traditional self-storage unit might be better. For most people, portable storage units are the better choice. 

Can You Use a Portable Storage Unit for Long-Distance Moves? 

Yes, you can use a portable storage unit for long-distance moves. 

With traditional moving methods, you have to hire movers and trust them with your things. With a portable storage unit, you can load your things yourself, and the unit is delivered to your home. You can unload your things at your pace. 

Big Box Storage offers portable storage units that can be shipped to locations across the US. This makes them a good choice for people who are moving across the country. 

Frequently Asked Questions

A: A portable storage unit is a container that gets delivered to your home or business. You load it yourself. Then it can be stored at your place, taken to a facility, or moved to a new location. 

A: Most providers let you rent it monthly. You can keep the portable storage unit as long as you need it. When you’re done, you can request it to be redirected.

A: Quality portable storage units are made of wood. They can handle different weather conditions. If you have items that are sensitive to temperature, ask your provider if they have climate-controlled storage available.

A: The cost of a portable storage unit depends on its size, how long you rent it, and if you need it to move or store it at a facility. Big Box Storage starts at $89. This makes it one of the more affordable options in San Diego. 

A: Most companies need someone to be home when the portable storage unit is delivered. This is to confirm where it is placed. When it’s picked up, it’s often more flexible. Check with your provider for their policy. 

Best Way to Unpack After Moving: A Room-by-Room Guide

Best way to unpack after moving starts with a plan, not with ripping open the nearest box. After the exhaustion of packing, loading, and transporting everything you own, the last thing most people want to face is a mountain of cardboard in every room. But how you approach unpacking determines whether you settle into your new home in days or spend weeks tripping over half-opened boxes. If you recently went through the stress of packing everything up, you already know how important organization is, and our guide on how to pack a bedroom covers the other side of this process in detail.

This guide breaks down a proven strategy to help you unpack efficiently, stay organized, and actually enjoy your new space from day one.

Woman sitting on couch writing an unpacking checklist surrounded by moving boxes and packing supplies showing the best way to unpack after moving

Why Having an Unpacking Strategy Matters

Most people think unpacking is the easy part. You just open boxes and put things away, right? In reality, unpacking without a plan leads to clutter, misplaced essentials, and the dreaded situation where half your home is livable and the other half is a storage room of unopened boxes for months.

A structured approach saves you time, prevents duplicate purchases of things you cannot find, and helps you make intentional decisions about where everything belongs in your new layout. Your new home has different cabinet sizes, closet configurations, and room dimensions than your old one. Unpacking is your chance to set up organizational systems that actually work for the space you are living in now rather than recreating the same setup from before.

Before You Open a Single Box

Resist the urge to dive in immediately. Before you unpack anything, take thirty minutes to walk through your new home and map out where you want things to go. Open every cabinet, closet, and drawer. Get a feel for the available storage and think about what makes sense for your daily routines.

If it helps, use sticky notes to label shelves and drawers with what you plan to put there. This is especially useful if you have family members or friends helping you unpack because everyone will know exactly where items belong without having to ask.

Also, make sure your cleaning supplies are accessible. You will want to wipe down shelves, countertops, and the insides of cabinets before loading them up with your belongings. A quick clean before unpacking saves you from having to remove everything later.

Start With Your Essentials Box

If you packed a first-night essentials box before your move, now is the time it earns its value. This box should contain the things you need to survive the first twenty-four hours: toiletries, a change of clothes, phone chargers, medications, basic kitchen items like paper plates and cups, snacks, coffee, trash bags, and toilet paper.

If you did not pack one, simply locate the boxes containing these items first and open those before anything else. Having these basics available immediately takes the pressure off and lets you unpack the rest at a reasonable pace instead of frantically searching through dozens of boxes for your toothbrush.

The Room-by-Room Unpacking Order

There is a logical sequence to unpacking that prevents wasted effort and keeps you moving forward. Follow this order for the smoothest experience.

Kitchen First

The kitchen is the heart of any home, and getting it functional should be your top priority. You need to eat, drink water, and make coffee, so this room earns first place every time.

Start with everyday essentials like plates, glasses, mugs, utensils, and a few key pots and pans. Set up your coffee maker or kettle. Get dish soap and a sponge in place by the sink. Once the basics are handled, move on to pantry items, small appliances, and specialty cookware. Leave decorative items and rarely used gadgets for last.

Take this opportunity to rethink your kitchen layout. Place the items you use daily in the most accessible spots. Heavy pots can go in lower cabinets, while seasonal bakeware gets tucked into harder-to-reach areas.

Bathrooms Next

After the kitchen, the bathrooms come second. You want to be able to shower, brush your teeth, and feel human again. Unpack towels, soap, shampoo, toilet paper, and medications first. Hang the shower curtain and lay out a bath mat. If you have multiple bathrooms, prioritize the one the whole household will use most.

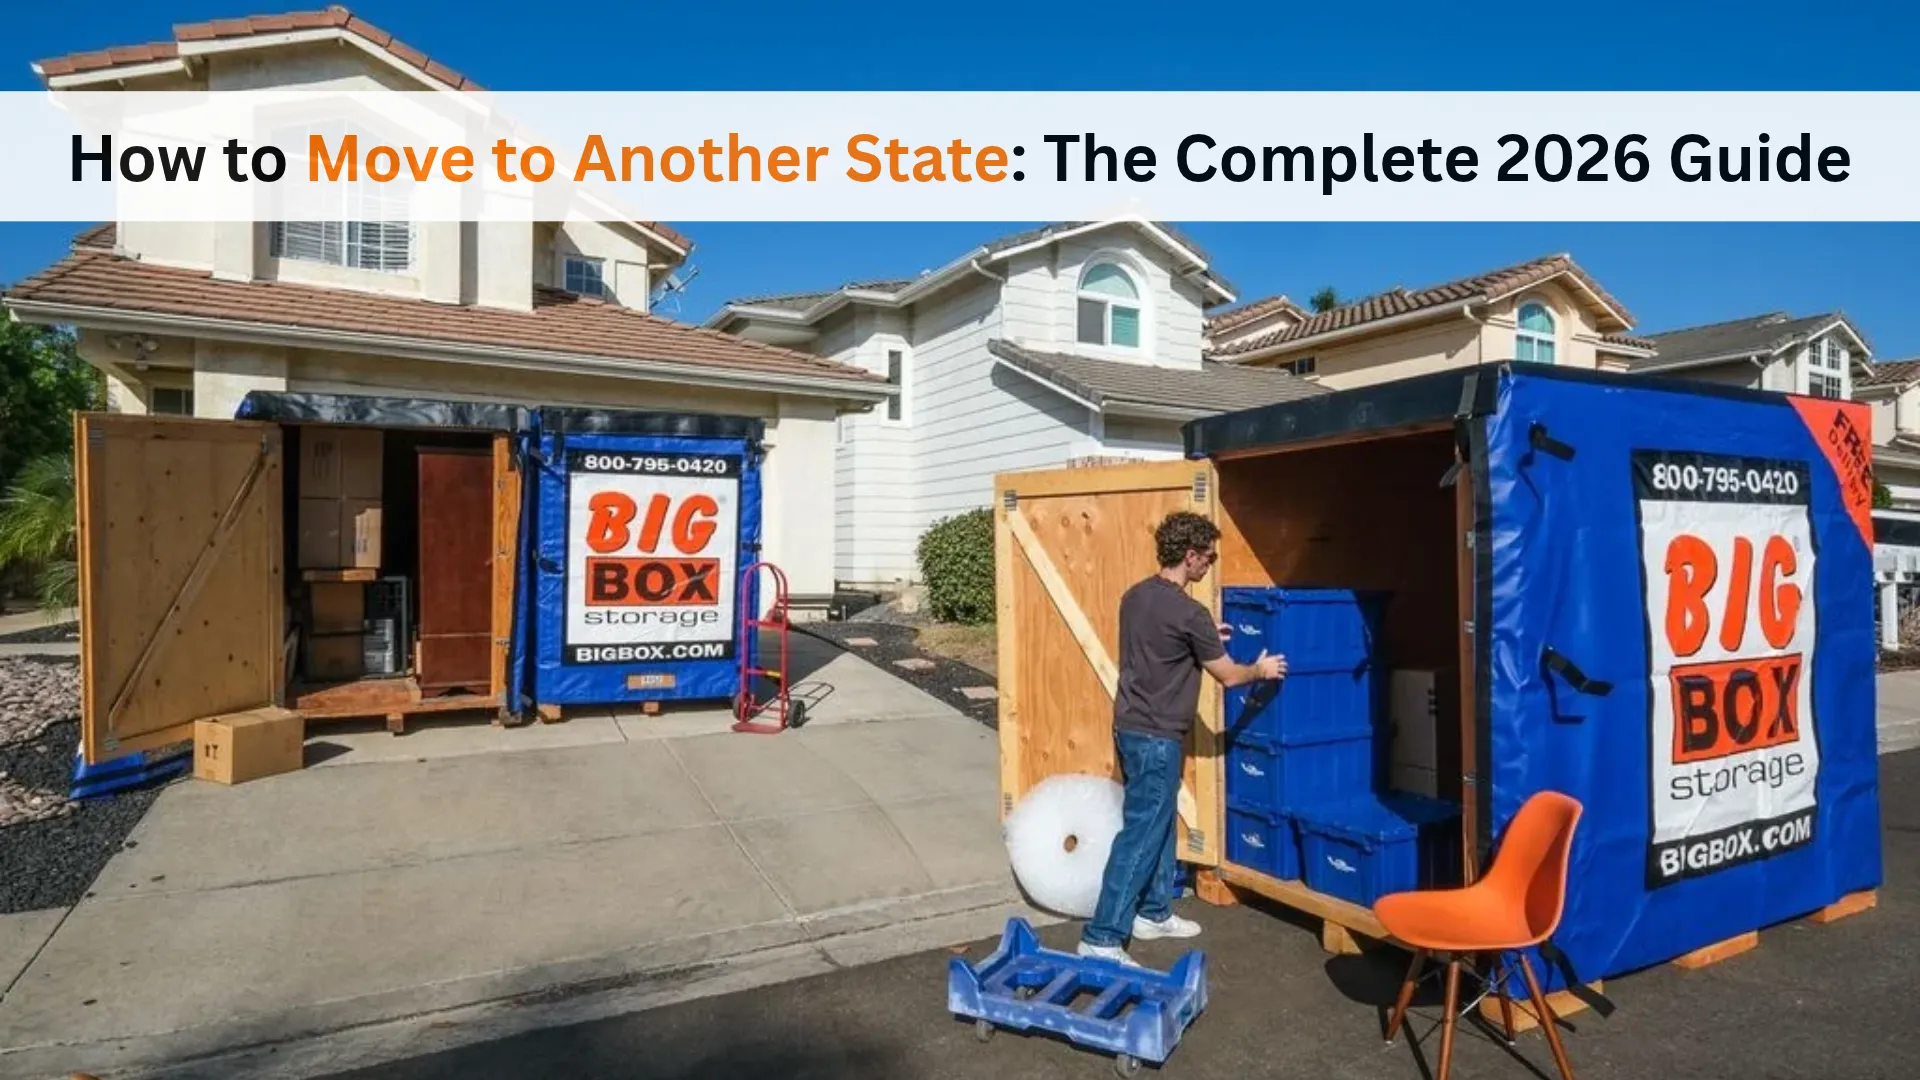
Man unloading moving boxes and bubble wrap from an open Big Box Storage container as part of the best way to unpack after moving to a new home

Bedrooms for a Good Night’s Sleep

A proper bed is non-negotiable after a long moving day. Assemble your bed frame if needed, get the mattress set up, and make the bed with fresh sheets and pillows. Unpack a few outfits and hang them in the closet so you are not digging through boxes in the morning.

You do not need to organize your entire wardrobe right away. Focus on the next three to five days of clothing and handle the rest once the higher-priority rooms are complete.

Living Room and Common Areas

Once the essentials are covered, turn your attention to the living room. Set up the couch, connect the TV, and arrange a few comfort items like throw blankets and pillows. This gives your household a place to relax and decompress after a long day of unpacking.

If you have a home office and work remotely, treat that as a priority alongside the living room. You need a functional workspace to get back to your routine.

Spare Rooms, Garage, and Storage Areas

Dining rooms, guest bedrooms, the garage, and any bonus rooms come last. These spaces are not critical for daily life, so they can wait a few days or even a couple of weeks without causing any disruption.

For items that you know you will not need right away, such as holiday decorations, seasonal clothing, or archived documents, consider keeping them packed and placing them directly into a portable storage container until you are fully settled. This keeps your living spaces clear and gives you breathing room to unpack at your own pace.

Break Down Boxes as You Go

One of the biggest mistakes people make is unpacking boxes and leaving the empty cardboard piled up in the corner. Flatten each box as soon as you finish with it and move it to a designated spot, whether that is the garage, a recycling bin, or a stack by the front door for disposal.

Getting rid of packing materials in real time makes your home feel more settled faster. The visual clutter of empty boxes tricks your brain into thinking you still have a long way to go, even when you have made significant progress.

Declutter While You Unpack

Moving is one of the best opportunities to edit your belongings. As you unpack each box, ask yourself whether each item deserves a spot in your new home. If you forgot you owned something or cannot figure out where it should go, that is a strong signal to donate or discard it.

Set up two designated bins or bags near your unpacking area, one for donations and one for trash. Making these decisions in the moment is far easier than unpacking everything and trying to declutter later when items already have an assigned place.

Set Realistic Expectations

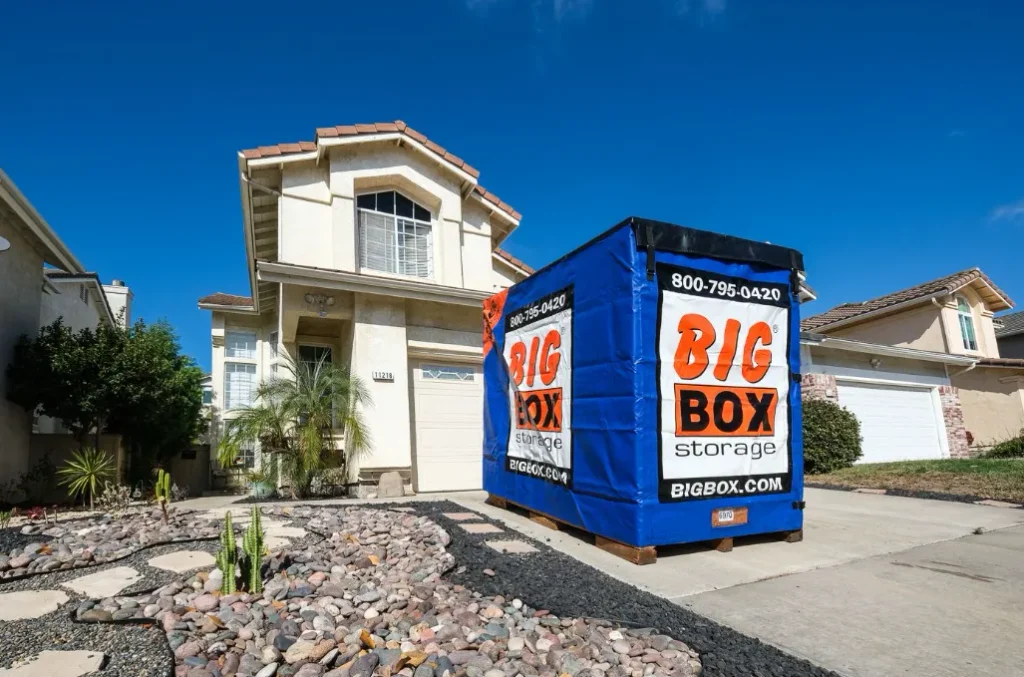
Big Box Storage portable container delivered to a residential driveway in San Diego ready for easy unpacking after moving

Professional organizers estimate that fully unpacking a home takes anywhere from a few days to several weeks depending on the size of your household. Do not expect to have everything perfectly placed on day one. Focus on making each room functional first and circle back for the finishing touches like hanging art, arranging bookshelves, and styling decor once the necessities are handled.

Break the process into manageable sessions rather than exhausting yourself in one marathon push. Tackle one or two rooms per day and celebrate the progress you make. The goal is a home that feels livable and organized, not a race to empty every box as fast as possible.

Quick Recap: Your Unpacking Game Plan

To wrap up, the best way to unpack after moving follows a clear sequence. Walk through your home and map out where things will go before opening any boxes. Unpack your essentials box first so you have what you need for the first night. Tackle the kitchen, then bathrooms, then bedrooms in that order. Set up the living room and home office next. Save spare rooms and storage areas for last. Break down boxes immediately and declutter as you go. Give yourself grace and take it one room at a time.

Moving into a new home should feel exciting, not overwhelming. With the right strategy, you can turn a chaotic pile of boxes into a comfortable, organized home faster than you think.

How to Move Jewelry Safely: Tips to Protect Your Pieces

How to move jewelry without losing, tangling, or damaging your favorite pieces is one of the most overlooked parts of any relocation. Whether you own a handful of sentimental rings or an entire drawer full of necklaces and bracelets, jewelry requires extra care that most moving boxes simply cannot provide. Unlike bulky furniture or kitchen appliances, jewelry is small, delicate, and often irreplaceable. If you have been busy getting ready for a big move, you might also want to check out our guide on how to pack a TV for moving to make sure all of your fragile belongings arrive in one piece.

In this guide, we will walk you through everything you need to know to pack and transport your jewelry collection safely, whether you are moving across town or across the country.

Delicate jewelry carefully packed in a small box with protective shredded paper showing how to move jewelry safely during a move

Why Jewelry Deserves Special Attention on Moving Day

Most people spend hours wrapping dishes and padding furniture but forget about the small velvet box sitting on the dresser until the last minute. Jewelry is uniquely vulnerable during a move for several reasons. Chains tangle easily when tossed into a bag together. Gemstones can chip if they knock against each other. Earring backs disappear into the seams of cardboard boxes. And perhaps most importantly, jewelry is a high-theft target that should never be packed inside a standard moving truck without supervision.

Taking a little extra time to plan how you handle your jewelry on moving day can save you from heartbreak, costly repairs, and insurance claims down the road.

Sort and Inventory Your Collection First

Before you start wrapping anything, take stock of what you actually own. Lay everything out on a clean, soft surface like a towel and sort your pieces into categories.

Separate your items into everyday jewelry, fine or high-value pieces, costume jewelry, and sentimental items. Photograph each piece individually, especially anything of significant financial or emotional value. This visual record serves as both a packing checklist and documentation for insurance purposes in case something goes missing.

Once you have a clear picture of your collection, decide which pieces you want to keep on your person during the move and which can be packed. Anything extremely valuable, such as engagement rings, heirloom necklaces, or high-end watches, should travel with you personally and never go into a moving box.

Essential Packing Supplies for Jewelry

You do not need expensive specialty products to protect your jewelry during a move. Most of what you need is already lying around your home. Gather the following supplies before you begin.

Use small resealable plastic bags for earrings and loose stones. Soft microfiber cloths or tissue paper work well for wrapping individual pieces. Egg cartons are perfect for storing rings and stud earrings in separate compartments. Plastic straws can keep thin chain necklaces from tangling when you thread the chain through. Small cardboard boxes, pill organizers, or even ice cube trays can serve as dividers. Packing tape, rubber bands, and labels round out your kit.

If you already have jewelry boxes with built-in compartments, those are ideal for transport. Just make sure items cannot shift around by filling empty spaces with cotton balls or tissue.

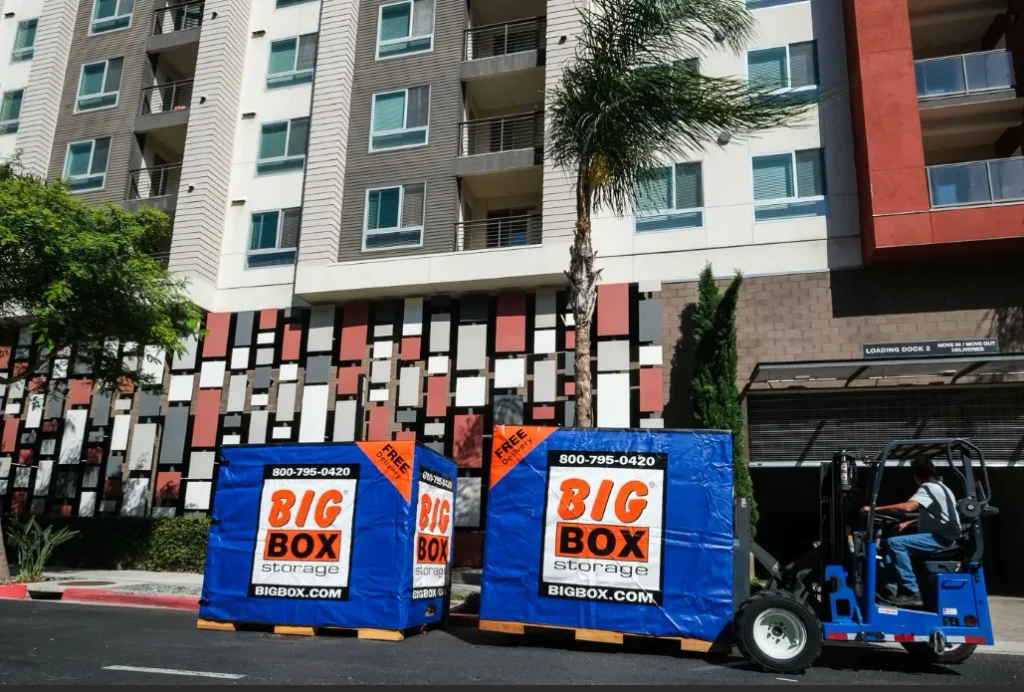
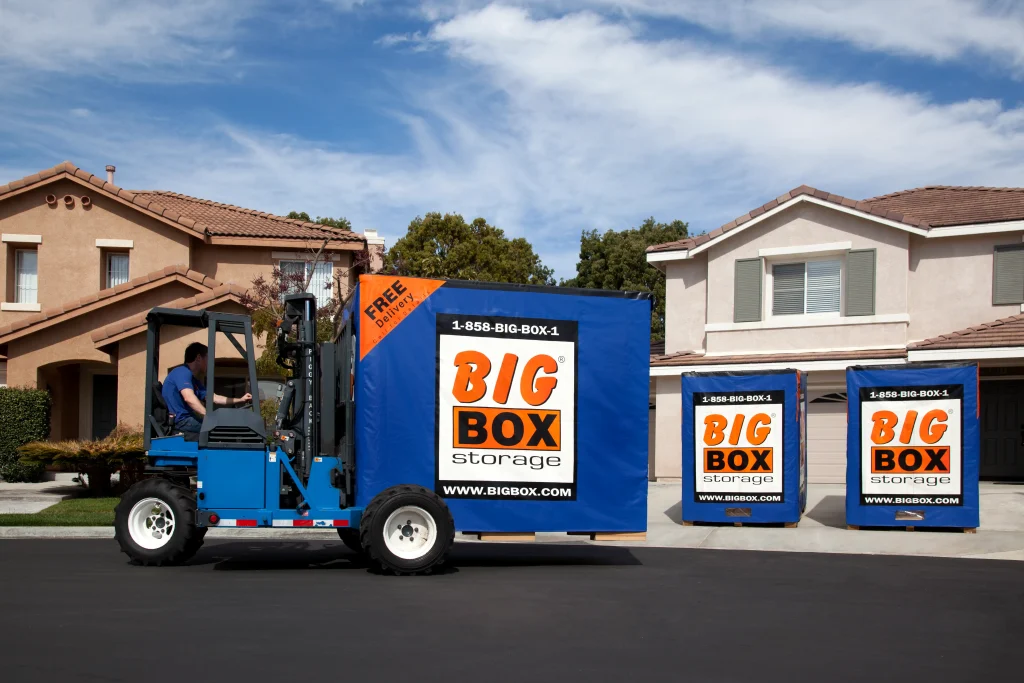
Big Box Storage employee operating a forklift to deliver a portable storage container to a residential home in San Diego

How to Pack Necklaces Without Tangling

Necklaces are the trickiest items to move because chains love to knot themselves the moment they touch another chain. Here are a few proven techniques.

For thin chain necklaces, unclasp one end and thread it through a plastic drinking straw, then re-clasp. The straw keeps the chain rigid and prevents it from twisting around other pieces. For beaded or thicker necklaces, lay each one flat on a piece of tissue paper, fold the paper over gently, and roll it into a soft tube. Secure with a small piece of tape.

You can also use the cling wrap method. Press each necklace flat against a sheet of plastic wrap, then lay another sheet on top. The static holds each piece in place and keeps everything separated.

How to Pack Rings, Earrings, and Bracelets

Rings can scratch each other if they share the same pouch, so wrap each ring individually in a small piece of tissue or place them in separate slots of an egg carton or pill organizer. If you are packing multiple rings together, put each one in its own small bag first.

For earrings, keep pairs together by poking studs through a small piece of cardboard or a button and securing the backs. Dangle earrings should be wrapped individually in tissue to prevent bending.

Bracelets and bangles can be stacked together if they are made of the same material, but separate metals from gemstone pieces. Wrap each stack in a soft cloth and place them upright in a small box so they do not shift.

Keep High-Value Jewelry With You

This is the single most important rule when figuring out how to move jewelry. Never put your most valuable pieces into the back of a moving truck. Pack them in a personal bag or carry-on that stays with you at all times during the move.

Consider using a portable storage container for the rest of your belongings, which gives you the flexibility to pack and load on your own schedule while keeping your home secure. With a container delivered right to your driveway, you control the process and can keep your jewelry packed separately until you are ready to transport it yourself.

A small, padded jewelry travel case or even a zippered makeup bag works perfectly for carrying your high-value items. Keep it in your car, handbag, or backpack rather than placing it in any box that will be handled by someone else.

Special Considerations for Long-Distance Moves

If you are moving across state lines or shipping your belongings, take a few extra precautions with your jewelry.

Contact your homeowner’s or renter’s insurance provider and confirm that your jewelry is covered during transit. Some policies have specific exclusions for items in moving trucks. If you own pieces above a certain value threshold, you may need a separate jewelry rider or floater policy.

For extremely valuable collections, consider shipping insured through a specialized service rather than packing them with the rest of your household goods. Many jewelers and specialty shipping companies offer secure transit options with full insurance coverage.

Big Box Storage delivery truck transporting two portable storage units through a San Diego residential street for a local move

Unpacking and Organizing at Your New Home

Once you arrive at your new place, unpack your jewelry early, ideally before you tackle the kitchen or living room. This reduces the chance of a small jewelry box getting buried under heavier items or accidentally thrown out with packing materials.

Check each piece against your photo inventory to make sure nothing is missing. Inspect for any damage such as loose prongs, bent clasps, or missing stones. If you notice any issues, document them immediately for insurance purposes.

Set up a temporary jewelry station, even if it is just a towel on the bathroom counter, so that everything has a designated spot while you get settled.

Quick Recap: Moving Jewelry the Right Way

To summarize the best practices for moving your jewelry safely, start by inventorying and photographing your collection. Sort items by type and value. Gather simple packing supplies like bags, tissue, straws, and small boxes. Pack necklaces using straws or cling wrap to prevent tangling. Wrap rings and earrings individually and keep pairs together. Carry high-value and sentimental pieces with you personally. Confirm insurance coverage, especially for long-distance moves. Unpack and inspect your jewelry first at your new home.

Moving can be stressful, but your jewelry does not have to be a casualty of the process. A little preparation goes a long way toward making sure every ring, necklace, and bracelet arrives at your new home exactly the way it left the old one.

How to Pack a Bedroom: The Complete Guide to Stress-Free Moving

Packing up your bedroom for a move can feel overwhelming. Your bedroom holds everything from clothing and bedding to furniture, electronics, and treasured personal belongings. Unlike other rooms, you need your bedroom functional until the very last moment—because everyone needs a good night’s sleep, especially during the chaos of moving. If you’re planning ahead and comparing packing and storage options, this guide to the best portable storage containers can help you understand which solutions make moving easier.

At BigBox Storage, we’ve helped thousands of San Diego families navigate their moves since 2003. This comprehensive guide will show you exactly how to pack a bedroom while keeping your stress levels low and your belongings safe.

Person loading boxes and bubble wrap into Big Box container showing how to pack bedroom furniture and belongings safely

Step 1: Declutter Before You Pack

Before you start wrapping and boxing, take time to declutter. Moving is the perfect opportunity to sort through your belongings and eliminate items you no longer need. This reduces your moving costs and ensures you’re only unpacking things you actually want in your new home.

Create four sorting piles:

  • Keep: Items you use regularly or have sentimental value
  • Donate: Gently used items in good condition
  • Sell: Valuable items you no longer need
  • Discard: Damaged or unusable items

Decluttering your wardrobe: If you haven’t worn something in over a year (excluding special occasion pieces), it’s time to let it go. Part with items that no longer fit, show signs of irreparable wear, or don’t match your current style. Sort through old hangers, donate extra bedding, and clear out nightstand drawers.

Step 2: Gather Your Packing Supplies

Having the right packing materials ready makes the entire process smoother. For bedroom packing, you’ll need:

Essential supplies:

  • Various sized boxes (small, medium, large)
  • Wardrobe boxes for hanging clothes
  • Mattress bags or covers
  • Bubble wrap and packing paper
  • Packing tape and scissors
  • Permanent markers for labeling
  • Furniture blankets or moving pads
  • Garbage bags for pillows and linens
  • Vacuum-seal bags for bulky bedding

Pro tip from BigBox Storage: Use items you already have! Suitcases, duffel bags, and laundry baskets are perfect for packing clothing, shoes, and accessories. This saves box space and makes the most of what you own.

Step 3: Create an Essentials Bag

Pack an overnight bag with essentials for the first 2-3 days in your new home. This prevents you from frantically tearing through boxes looking for pajamas, phone chargers, or toiletries.

Your essentials bag should include:

  • 2-3 outfits and undergarments
  • Pajamas and comfortable clothes
  • Toiletries (toothbrush, toothpaste, shampoo, soap)
  • Phone chargers and important electronics
  • Medications and prescriptions
  • Basic bedding (sheets, pillow, blanket)
  • Important documents and valuables

Keep this bag with you during the move—never pack it in your moving truck or storage container.

Step 4: Follow a Strategic Packing Timeline

When learning how to pack a bedroom efficiently, timing is everything. Pack as much as possible ahead of time while maintaining a functional sleeping space.

3-4 weeks before moving:

  • Pack guest bedrooms and spare rooms first
  • Box up off-season clothing and extra linens
  • Pack decorative items, books, and collectibles

2 weeks before moving:

  • Pack clothing you won’t need before the move
  • Box up most accessories, shoes, and jewelry
  • Disassemble furniture you don’t need daily

1 week before moving:

  • Pack remaining non-essential clothing
  • Box up most toiletries (keep daily essentials)
  • Prepare wardrobes and closets for final packing

Moving day:

  • Pack final essentials, strip the bed, and place mattress in protective bag

Step 5: Pack Your Clothing Efficiently

Big Box Storage delivery truck transporting multiple containers with packed bedroom items demonstrating how to pack bedroom efficiently

Clothing makes up a significant portion of your bedroom belongings, so packing it efficiently saves time and space.

For hanging clothes: Use wardrobe boxes that allow you to transfer clothing directly from your closet while still on hangers. This keeps clothing wrinkle-free and makes unpacking fast. Alternatively, for local moves, keep clothes on hangers and slip large garbage bags over groups of 10-15 items.

For folded clothes: Leave clothing in dresser drawers, remove the drawers from the dresser, and wrap them securely with shrink wrap. This saves time and keeps clothing organized. Or fold items and pack them into boxes or suitcases, grouping similar items together.

Pro tip: Use vacuum-seal bags for bulky items like sweaters and jackets. These compress your belongings significantly, saving valuable space in your BigBox Storage container.

Step 6: Pack Bedding and Linens

Sheets, blankets, and pillows are bulky but lightweight, making them perfect for filling large boxes or using as protective padding.

Wash everything first: Before packing any bedding, wash and fully dry everything. You don’t want to unpack musty-smelling items or risk mildew growth during storage.

Packing methods:

  • Use large boxes or garbage bags for pillows and blankets
  • Vacuum-seal bulky comforters and seasonal bedding
  • Use linens as padding around fragile items (label which box they’re in)
  • Keep one set of sheets and blankets accessible until moving day

Step 7: Protect Your Mattress

Your mattress deserves proper protection to prevent dirt, moisture, and damage during the move.

How to pack your mattress:

  1. Strip all bedding completely
  2. Vacuum the mattress to remove dust
  3. Slide the mattress into a mattress bag or cover
  4. Seal the bag with heavy-duty tape
  5. Stand the mattress upright against the back wall in your storage container

Standing your mattress vertically in a container designed for moving storage solutions helps save floor space and creates a padded wall that protects other items from shifting during transport.

Step 8: Handle Valuables and Jewelry Carefully

Expensive jewelry, important documents, and irreplaceable heirlooms should never be packed with your regular belongings.

For jewelry and valuables:

  • Keep expensive pieces in your personal essentials bag
  • Wrap individual items in tissue paper or bubble wrap
  • Store in original jewelry boxes or small containers
  • Transport these items in your personal vehicle

For important documents: Keep passports, birth certificates, Social Security cards, and property titles with you at all times. Use a waterproof document holder and place it in your essentials bag.

Step 9: Pack Fragile Items and Electronics

Bedrooms often contain delicate items like lamps, picture frames, mirrors, and electronics that require careful packing.

For fragile decor:

  • Wrap each item individually in bubble wrap or packing paper
  • Use small boxes for delicate items
  • Fill empty spaces with packing material to prevent shifting
  • Label boxes as “FRAGILE” on multiple sides
  • Place these boxes on top of heavier items

For electronics: Pack TVs and electronics in their original boxes if possible. If not, wrap screens with furniture blankets and secure them with tape. Keep all cords and remotes together in a labeled bag.

Step 10: Disassemble and Pack Furniture

Bedroom furniture like bed frames, dressers, and nightstands often requires disassembly for easier transport.

Furniture packing tips:

  • Take photos before disassembling to remember how pieces fit together
  • Place all screws and hardware in labeled plastic bags
  • Tape hardware bags to the furniture piece they belong to
  • Wrap furniture in moving blankets to prevent scratches
  • Remove drawers from dressers and wrap them separately
  • Distribute furniture weight evenly in your container

Why BigBox Storage Makes Bedroom Packing Easier

Big Box Storage forklift delivering portable storage container for how to pack bedroom items during residential move

Learning how to pack a bedroom is simpler when you have adequate space to organize and store your belongings. BigBox Storage delivers portable storage containers directly to your driveway, giving you the flexibility to pack at your own pace.

Benefits of using BigBox Storage:

Convenient on-site access: Pack and organize your bedroom items without rushing. Load your container over days or weeks, accessing it whenever you need.

Flexible storage options: Keep your container on-site during your move, or we’ll transport it to our secure facility if you need time between homes.

Weather-resistant protection: Our sturdy containers protect your bedroom belongings from San Diego’s sun, rain, and dust.

Pay only for what you use: Order as many containers as you think you’ll need—you only pay for the ones you actually use.

Trusted since 2003: With over 70,000 containers delivered across San Diego, we’ve helped thousands of families through successful moves.

Start Your Stress-Free Move Today

Now you know exactly how to pack a bedroom efficiently, from decluttering to the final box. The key to success is planning ahead, staying organized, and having adequate storage space to keep everything safe and accessible.

At BigBox Storage, we make moving simple, safe, and stress-free. Whether you’re moving across San Diego or need temporary storage during a home renovation, our portable storage containers give you the flexibility and space you need to pack properly—without the rush.

Ready to make your move easier? Contact BigBox Storage today to learn more about our convenient storage solutions. With thousands of satisfied customers and over 70,000 containers delivered, we’re San Diego’s trusted choice for stress-free moving and storage.

Top 10 Home Renovation Mistakes That Cost You Big

Home renovations are thrilling—you’re finally getting that dream kitchen, updating your outdated bathroom, or adding much-needed living space. But beneath the excitement lies a minefield of potential mistakes that can derail your project, drain your wallet, and test your patience. After helping thousands of San Diego homeowners through their renovation journeys since 2003, we’ve seen it all at BigBox Storage. If you’re evaluating your options for temporary storage and organization during a remodel, our guide to best portable storage containers can help you understand the available choices and what will fit your needs.

The good news? Most of these pitfalls are completely avoidable. Let’s dive into the top 10 home renovation mistakes and discover practical solutions to keep your project on track.

Big Box storage container open revealing furniture protection during home renovation to avoid common home renovation mistakes and damage

1. Starting Without a Comprehensive Plan

The biggest renovation mistake isn’t what you do—it’s what you don’t do before you start. Diving into a renovation without a detailed plan is like building a house without blueprints. You’ll waste materials, make expensive mid-project changes, and face countless delays.

How to avoid it: Create a detailed scope of work that outlines every phase of your renovation. Develop realistic timelines with your contractor, accounting for material lead times and permit approvals. Build a budget with a 15-20% contingency fund for unexpected discoveries like hidden water damage or outdated electrical systems. Most importantly, map out where you’ll store belongings, materials, and debris throughout the project.

2. Underestimating Your Storage Needs

Here’s a mistake that catches almost everyone off guard: underestimating how much stuff you’ll need to move and store during renovations. When you’re gutting a kitchen or remodeling multiple rooms, furniture, appliances, family heirlooms, and everyday essentials all need to go somewhere safe and accessible.

The BigBox solution: Instead of cramming items into spare rooms, many homeowners rely on portable moving and storage solutions that bring secure containers directly to their driveway. BigBox Storage delivers portable storage containers directly to your home—you load them at your own pace, and they stay on-site or we can move them to our secure facility. You only pay for what you actually use, and you can access your belongings whenever you need them.

With over 70,000 BigBox containers delivered across San Diego since 2003, we’ve perfected the art of renovation storage. Our weather-resistant containers protect your possessions from dust, debris, and California weather while giving your contractors the clear workspace they need.

3. Hiring the Cheapest Contractor Without Due Diligence

Renovation costs add up quickly, so why not save money by choosing the lowest bidder? Because cheap often becomes expensive when you factor in poor workmanship, missed deadlines, and the cost of fixing botched work.

Red flags to watch for: No valid contractor’s license or insurance documentation, reluctance to provide references, vague contracts without specific timelines, and pressure to pay large deposits upfront in cash.

Interview at least three licensed contractors. Check their references, visit recent projects if possible, and verify their insurance coverage. A slightly higher upfront cost with a reputable contractor almost always costs less than hiring someone cheap who cuts corners.

4. Ignoring Required Permits

“It’s just a small project—we don’t need permits, right?” Wrong. This common renovation mistake can have serious consequences, from fines and stop-work orders to difficulty selling your home down the line. Many jurisdictions require permits for electrical work, plumbing, structural changes, and even major cosmetic updates.

Permits ensure work meets current building codes and safety standards. Inspections catch potential problems before they become expensive disasters. Work with licensed contractors who understand local permit requirements and handle the paperwork for you.

5. Failing to Plan for Debris and Waste Management

Even modest renovations generate shocking amounts of waste. Ripping out a kitchen means old cabinets, countertops, flooring, drywall, and packaging from new materials. Without a solid waste management plan, debris piles up, creates safety hazards, and brings your project to a grinding halt.

Estimate debris volume before starting and arrange appropriate disposal solutions early. Rent a dumpster or waste removal service, set up designated sorting areas for recyclables and donations, and schedule regular debris removal to keep your work area safe and accessible. Many San Diego homeowners pair BigBox Storage containers with dumpster rentals—using storage containers for belongings and dumpsters for waste keeps everything organized.

6. Choosing Materials Based on Looks Alone

That gorgeous imported tile looks stunning in the showroom, but is it practical for your high-traffic entryway? Choosing materials purely for aesthetics without considering durability, maintenance, and lifestyle factors is a recipe for disappointment and premature replacement.

Consider how you actually use each space—kids, pets, entertaining, working from home. Research maintenance requirements, think long-term about whether trendy choices will look dated in five years, and invest in quality for high-use areas like flooring, countertops, and cabinetry. Quality materials might cost more upfront, but they last longer and often increase your home’s resale value.

7. Underestimating Project Timelines

Those home improvement shows that complete entire renovations in a weekend? Pure fantasy. Real renovations take time—often more than you expect. Material delays, permit processing, weather issues, and unexpected problems can extend timelines significantly.

Add buffer time to every phase of your contractor’s timeline. Don’t schedule important events immediately after expected completion. If you’re living through a renovation, having your belongings safely stored in a BigBox container means you’re not anxiously waiting to unpack boxes cluttering your living space.

8. Neglecting Temporary Living Arrangements

Many homeowners underestimate how disruptive major renovations are. Living without a functional kitchen for weeks, breathing construction dust, or navigating around contractors every day quickly becomes overwhelming.

For major renovations, temporary relocation might be worth the cost. If staying home, create temporary setups in other rooms and establish clear boundaries about work hours and cleanup. BigBox Storage can make living through renovations more manageable by clearing out unnecessary items, reducing clutter, and giving you space to set up temporary living areas.

9. Making Impulsive Mid-Project Changes

Changing your mind mid-project is one of the fastest ways to blow your budget and timeline. Every change order creates a ripple effect: materials must be returned or reordered, contractors adjust schedules, timelines extend, and costs increase.

Make all major decisions before construction begins. Order materials and fixtures early to avoid delays. If you must make changes, understand the full cost and timeline implications first. Remember why you made your original choices—they were probably good ones.

10. Neglecting the Final Walkthrough

You’re exhausted, excited, and ready to move back in. But skipping the thorough final walkthrough is a critical mistake. This is your opportunity to identify and document items that need correction before you make final payment.

Inspect every room, closet, and fixture with your contractor. Test all electrical outlets, switches, and appliances. Check that doors and windows open properly and examine finish work for gaps or uneven paint. Create a detailed punch list of items requiring correction. Reputable contractors won’t consider the job complete until you’re 100% satisfied.

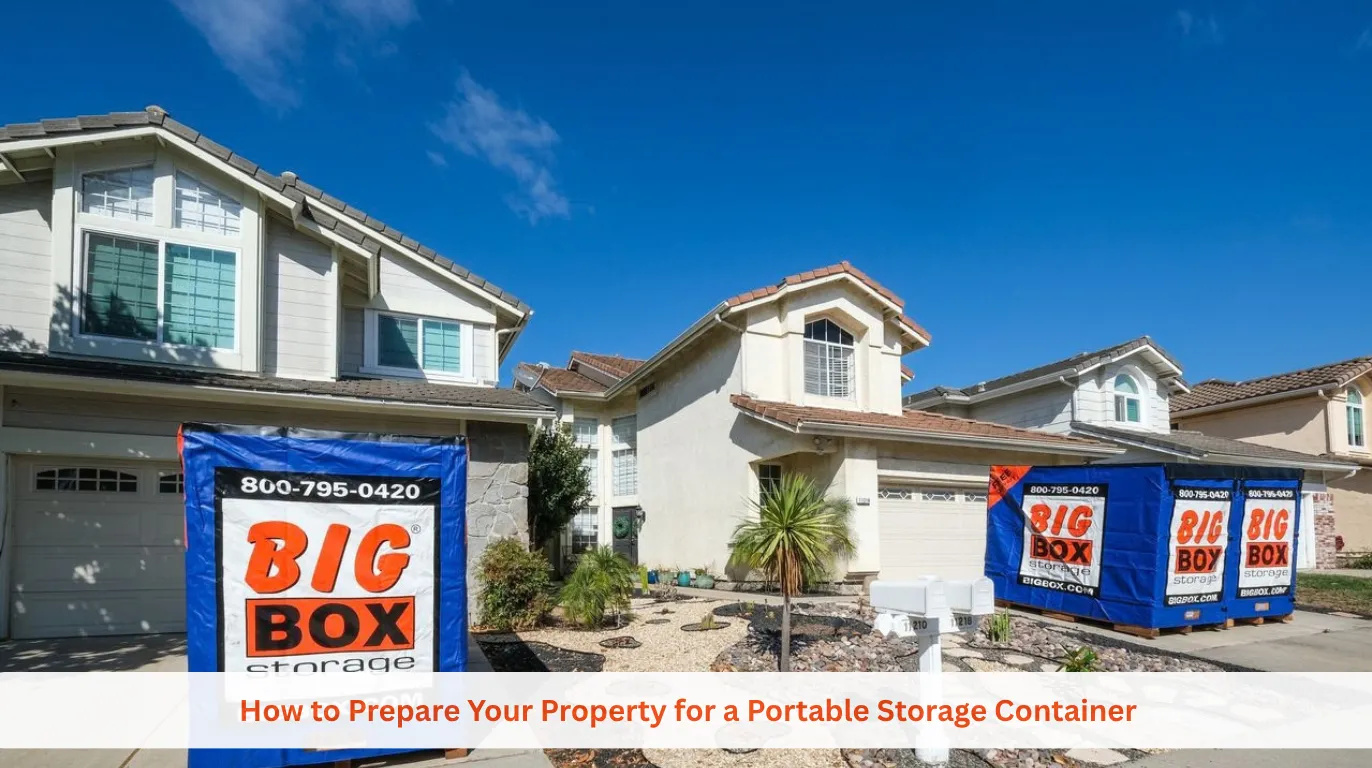
Big Box portable storage containers on residential driveway helping homeowners avoid home renovation mistakes with secure on-site storage

Make Your Renovation Stress-Free with BigBox Storage

Home renovations don’t have to be overwhelming. With proper planning, the right team, and smart storage solutions, you can transform your space while maintaining your sanity. At BigBox Storage, we’ve supported thousands of San Diego renovation projects since 2003, providing flexible, affordable storage that adapts to your needs.

Why San Diego homeowners trust BigBox:

  • Pay only for what you use: Order as many containers as you need; only pay for what you actually use
  • Convenient delivery: We bring storage directly to your home
  • Flexible options: Keep containers on-site for easy access or store them at our secure facility
  • Weather-resistant protection: Your belongings stay safe from dust and debris

Ready to start your renovation the right way? Contact BigBox Storage today and discover why we’ve delivered over 70,000 containers to satisfied customers across San Diego. Let us handle your storage needs so you can focus on creating the home of your dreams—without the renovation nightmares.

Condo vs Apartment vs Townhouse: Complete San Diego Housing Guide

Choosing between a condo vs apartment vs townhouse in San Diego isn’t just about where you’ll live—it affects your budget, lifestyle, commute, storage space, and long-term financial picture. With San Diego’s competitive housing market, understanding the real differences helps you make a confident decision and avoid costly surprises.

At Big Box Storage, we’ve helped over 70,000 San Diego residents move into apartments, condos, and townhouses. This guide breaks it all down in a clear, easy-to-digest way—plus shows how portable storage can make any move smoother.

1. Condo vs Apartment vs Townhouse: Quick Comparison

FeatureApartmentCondoTownhouse
OwnershipRentOwn interiorOwn structure + land
Typical LayoutSingle-levelSingle- or multi-levelMulti-level
Avg. San Diego Cost (2025)$2,100–$4,700/mo$650K–$1.2M+$750K–$1.4M+
MaintenanceLandlordInterior onlyInterior + some exterior
HOA FeesNone$300–$800+/mo$150–$500+/mo
Space500–1,200 sq ft700–1,800 sq ft1,200–2,500 sq ft
Best ForFlexibilityOwnership w/ low upkeepMore space & privacy
Big Box Storage Tip1-2 containers 2-3 containers3-4 containers

2. Understanding San Diego Housing Options

San Diego offers everything from downtown high-rise apartments to coastal condos and suburban townhouses. Each option comes with different costs, responsibilities, and space limitations—especially when it comes to storage.

That’s where Big Box Storage comes in. Our portable storage containers are delivered directly to your driveway or curb, letting you pack on your schedule. Whether you’re moving into a small apartment or upgrading to a townhouse, storage flexibility removes stress from the process.

This guide covers:

  • What apartments, condos, and townhouses really are
  • Pros and cons for San Diego living
  • 2026 pricing expectations
  • How to choose the right fit

3. What Is an Apartment?

Simple Definition

An apartment is a rental home inside a larger building. You don’t own it, don’t build equity, and don’t handle maintenance.

Key Features

  • Lease-based living
  • Maintenance handled by management
  • Shared amenities (gym, pool, parking)
  • Limited customization
  • Security deposit required

San Diego Apartment Market

Popular areas include Downtown, Gaslamp, Little Italy, Pacific Beach, and Mission Valley.

Typical rents (2025):

  • 1-bedroom: $2,100–$3,200
  • 2-bedroom: $3,000–$4,700

Apartments are great for flexibility—but storage space is often limited. Many renters use Big Box Storage for seasonal items, bikes, surfboards, or during unit transitions.

4. What Is a Condo?

Simple Definition

A condo is a home you own inside a shared building or community. You own the interior, while the HOA manages the exterior and common areas.

Key Features

  • Build equity
  • HOA handles exterior upkeep
  • More freedom than apartments
  • Monthly HOA fees

San Diego Condo Market

Condos are common near the coast and downtown.

Popular areas: La Jolla, Coronado, Ocean Beach, Marina District, East Village
Prices (2025): $650K–$1.5M+
HOA fees: $300–$800+ per month

Condos often lack garages or large closets, making portable storage ideal for downsizing, remodeling, or freeing up living space.

5. What Is a Townhouse?

Simple Definition

A townhouse is a multi-level home that shares side walls but includes ownership of both the structure and land.

Key Features

  • Private entrance
  • Multiple floors
  • Garage parking
  • Small yard or patio

San Diego Townhouse Market

Common in Carmel Valley, Mira Mesa, Scripps Ranch, and Rancho Bernardo.

Prices (2025): $750K–$1.4M
HOA fees: $150–$500/month

Townhouse moves often involve larger households—Big Box Storage containers make staging, remodeling, or phased moves much easier.

6. Key Differences Explained Simply

Ownership: Apartments are rented. Condos and townhouses build equity.

Space: Townhouses offer the most room, apartments the least.

Maintenance: Apartments require none. Condos are minimal. Townhouses require more involvement.

Storage: As space increases, so does the need for organized storage—especially during moves.

7. Pros & Cons at a Glance

Apartments

Pros: Flexible, no maintenance, lower upfront costs
Cons: No equity, rent increases, limited storage

Condos

Pros: Ownership, low maintenance, amenities
Cons: HOA fees, shared walls, storage limits

Townhouses

Pros: Space, privacy, garage, appreciation
Cons: Higher price, stairs, more upkeep

8. San Diego Cost Comparison (2025)

Upfront Costs:

  • Apartments: $4K–$8K
  • Condos: $40K–$120K+
  • Townhouses: $45K–$140K+

Monthly Costs:

  • Apartments: $2,100–$4,700
  • Condos: $3,400–$7,000+
  • Townhouses: $3,950–$8,050+

Over time, ownership typically wins in San Diego due to appreciation and tax benefits.

9. Quick Decision Guide

  • Want flexibility? → Apartment
  • Want ownership without heavy upkeep? → Condo
  • Need space and privacy? → Townhouse

Final Thoughts

Understanding the condo vs apartment vs townhouse difference makes choosing the right San Diego home easier. No matter which option fits your lifestyle, Big Box Storage helps you move smarter with portable storage containers delivered to your door.

Since 2003, Big Box Storage has been trusted by tens of thousands of San Diego residents for stress-free moves and storage. When you’re ready to move—or just need more space—we’re ready to help.

Short-Term Storage Solutions After a Home Flood: How Big Box Storage Can Help You Recover Quickly

When a flood hits your home—whether it’s from a broken washing machine, a burst pipe, a toilet overflow, or storm damage—your first priority is getting the water out and your belongings safe. Water damage can happen suddenly and escalate fast, leaving homeowners scrambling to protect furniture, electronics, and personal items from further ruin.

That’s where Big Box Storage comes in. We specialize in short-term storage solutions for flood recovery, providing fast, flexible, and secure storage containers delivered straight to your driveway. While restoration crews handle the water damage, you can keep your valuables dry and protected just steps away from your home.

In this guide, we’ll break down what to do after a home flood, how temporary storage helps protect your belongings, and why Big Box Storage is the most convenient option for short-term storage during flood recovery.

1. Why You Need Short-Term Storage After a Flood

When your home floods, your immediate instinct is to save what you can. But once the water is out, you’re left with wet floors, damaged drywall, and the smell of moisture that can quickly turn into mold. You can’t properly dry or repair your home while furniture, rugs, and boxes are still sitting in the space.

That’s why short-term storage becomes essential. Here’s what most homeowners face after a flood:

  • Restoration crews need clear access to flooring, baseboards, and walls for drying equipment.
  • Furniture and electronics need to be moved to prevent further damage.
  • Construction dust and debris can ruin items that were never wet to begin with.
  • Insurance adjusters may want your belongings out of the way to properly assess damage.

In short: you need a place to keep your stuff that’s close, secure, and dry—immediately.

2. The Stress of Flood Recovery—and How We Make It Easier

At Big Box Storage, we understand how stressful it is when your home floods. You’re juggling insurance claims, contractors, and cleanup—often while still living in a disrupted space. That’s why we’ve built our service around speed, convenience, and flexibility.

Here’s how our flood recovery storage process works:

  1. We deliver your Big Box directly to your driveway—usually within 24 hours.
  2. You (or your restoration team) load your items safely inside.
  3. You can keep the Big Box onsite while work is being done, or we can pick it up and store it in our secure, climate-protected facility until your home is ready.
  4. When you’re ready to move your items back, we redeliver the same box right to your home.

No moving trucks. No transferring your belongings twice. Just a fast, simple solution when you need it most.

3. What Types of Flood Damage Typically Require Temporary Storage

Flood damage can come from a variety of unexpected sources. Our customers reach out to us for all kinds of scenarios:

  • Burst pipes that soak carpets, floors, and baseboards.
  • Leaking washing machines that flood laundry rooms or nearby hallways.
  • Overflowing toilets or broken plumbing lines.
  • Roof leaks or heavy rainfall during San Diego’s wet season.
  • Storm or flash flood damage from weather-related events.

Regardless of how it starts, water damage leads to one common issue: your space isn’t livable or workable until everything is dry and repaired. That’s why Big Box Storage provides an immediate, flexible solution for anyone searching for “storage options during a home flood” or “temporary storage while repairing water damage.”

4. The Benefits of Using Portable Storage After a Flood

When you’re dealing with flood recovery, you don’t have time for complicated logistics. Renting a moving truck, driving to a storage unit, and unloading everything by hand isn’t just exhausting—it’s unnecessary. Portable storage like Big Box makes your recovery process much smoother.

Here’s why:

a. Onsite Convenience

Keep your items on your property—safe, visible, and accessible. You can check on them anytime, without driving to a storage facility.

b. Flexibility

Whether you need the box for a week or several months, Big Box Storage adjusts to your timeline. We work with your contractor’s schedule and restoration company to ensure you’re never rushed.

c. Safe and Weatherproof

Each Big Box unit is made to keep your items protected from the elements. You won’t need to worry about additional water damage once your items are stored.

d. No Double Handling

With traditional storage, you load everything into a truck, drive it to a facility, unload it, then do it all again when it’s time to move back. With Big Box, everything stays in one container the entire time—no double lifting or extra hassle.

e. Affordable and Transparent Pricing

Disaster recovery can come with plenty of unexpected costs. Big Box Storage provides simple, flat-rate pricing with no long-term commitments, making it ideal for short-term flood storage.

5. How Customers Commonly Use Big Box Storage During Flood Repairs

Every flood situation is different, but we’ve seen a few common patterns among our customers recovering from water damage:

  • Storing furniture and electronics onsite during flooring repairs.
  • Keeping valuables protected while contractors demo or repaint.
  • Temporarily relocating items while living in another part of the home or a hotel.
  • Preventing mold or mildew by getting items out of damp spaces quickly.

For example, one San Diego homeowner called us after a broken washing machine flooded her laundry room and hallway. Within hours, we delivered a Big Box to her driveway. Her restoration company loaded furniture, rugs, and boxes inside so the flooring team could start repairs immediately. She kept her belongings onsite for two weeks, then had us pick up the box once the project was complete.

That’s the kind of quick, stress-free recovery we aim to deliver every time.

6. Partnering with Restoration and Insurance Companies

We regularly work alongside water damage restoration companies and insurance adjusters who refer clients to us for temporary storage. They appreciate that Big Box Storage simplifies logistics, giving homeowners one less thing to worry about.

If you’re a restoration professional, we can coordinate delivery directly to your client’s home and handle pickup as soon as you’re done. If you’re a homeowner, we can provide documentation for insurance claims to make sure your temporary storage expenses are covered.

7. FAQ: What People Ask About Flood Storage

Q: What should I do with my furniture after a flood?
If your floors or carpets were affected, move furniture out of the flooded area as soon as possible. Big Box Storage can deliver a container to your home within 24 hours so you can keep your belongings safe and dry while repairs are made.

Q: How long can I keep a Big Box at my home?
As long as you need. Whether it’s one week or three months, you control the timeline. Many flood recovery projects take several weeks for drying, repairs, and inspections, so flexibility is key.

Q: Is onsite storage safe during a flood?
Yes. Big Box Storage units are weather-resistant and designed for outdoor use. Once your items are inside and the door is sealed, they’re protected from additional exposure.

Q: Can I have the box picked up and stored elsewhere?
Absolutely. We can store your Big Box at our secure, climate-protected facility and redeliver it once your home is ready.

Q: Will my insurance cover storage during flood recovery?
In many cases, yes. Homeowners insurance often covers temporary storage costs as part of the repair process. We can provide a detailed receipt or invoice for your claim.

8. Why Big Box Storage Is the #1 Choice for Flood Recovery in San Diego

Big Box Storage has been serving the San Diego area for over two decades, and we’ve helped thousands of homeowners through emergency situations like flooding, remodeling, and relocations.

When you call us after a flood, you’re not getting just a storage box—you’re getting a fast, local partner who understands what you’re going through and knows how to help.

Here’s why homeowners choose us:

  • Same-day or next-day delivery
  • Flexible rental periods
  • No trucks or driving required
  • Secure facility storage available
  • Excellent customer service from a local San Diego team

When life throws you an unexpected challenge like water damage, Big Box Storage makes it easier to get back on your feet—fast.

9. How to Get Started

If your home has just experienced flooding or water damage, the sooner you act, the better. Give Big Box Storage a call or request a quote online to get your Big Box delivered right away.

We’ll help you:

  1. Protect your valuables from further damage
  2. Create space for restoration crews
  3. Speed up the recovery process
  4. Get peace of mind during a stressful time

Final Thoughts

Flooding can turn your home upside down in an instant—but your recovery doesn’t have to be complicated. Whether it’s a plumbing issue, appliance leak, or storm damage, Big Box Storage gives you the flexibility, control, and security you need while your home is being repaired.

If you’re searching for “short-term storage after a flood”, “temporary storage during home water damage,” or “onsite storage after flood repair,” Big Box Storage is here to help. We’re local, reliable, and ready when you need us most.

Call Big Box Storage today to schedule your delivery and take the first step toward getting your home—and your life—back to normal.